
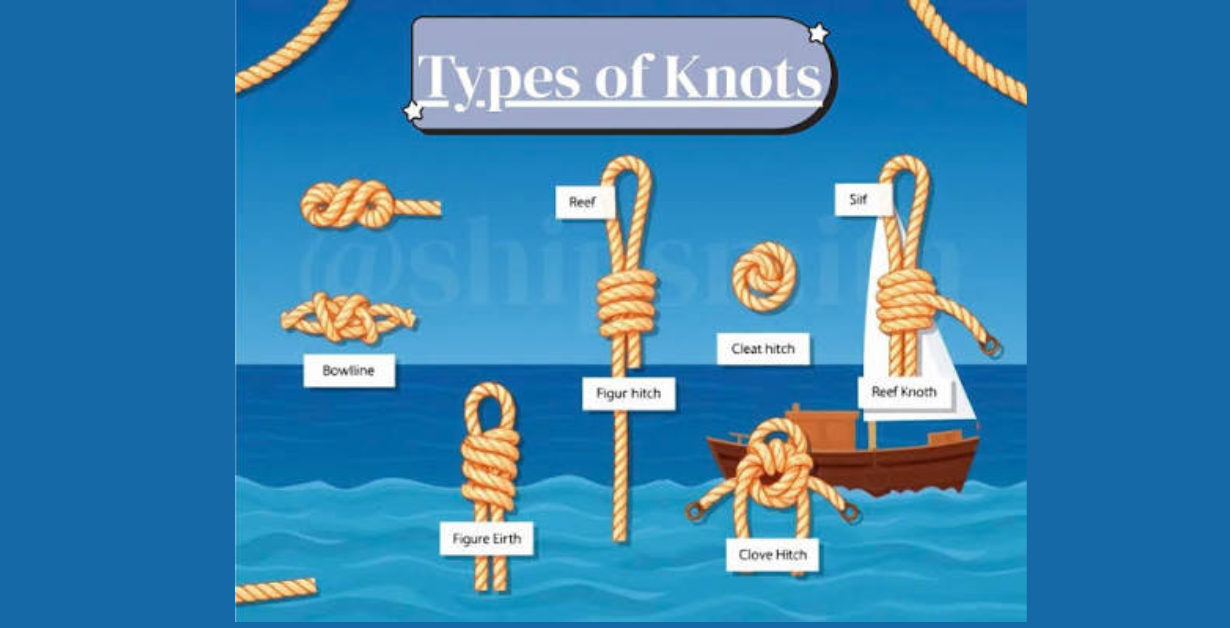
Knowing how to tie the right knot is an important boating skill. A properly tied knot can help secure a boat to a dock, attach a fender, join two lines, or create a temporary loop in an emergency.
However, not every knot is suitable for every situation. Some knots are designed to hold under load, while others are meant to be easy to untie after use. The best boating knots are dependable, practical, and easy to inspect.
Here are seven essential boating knots every boat owner should know.
When you’re preparing your boat for a trip, mechanical maintenance is only one part of staying safe on the water. It’s also important to have a reliable way to call for help in an emergency. Learn more in our guide to Personal Locator Beacon vs. Satellite Messenger: Which Is Better?
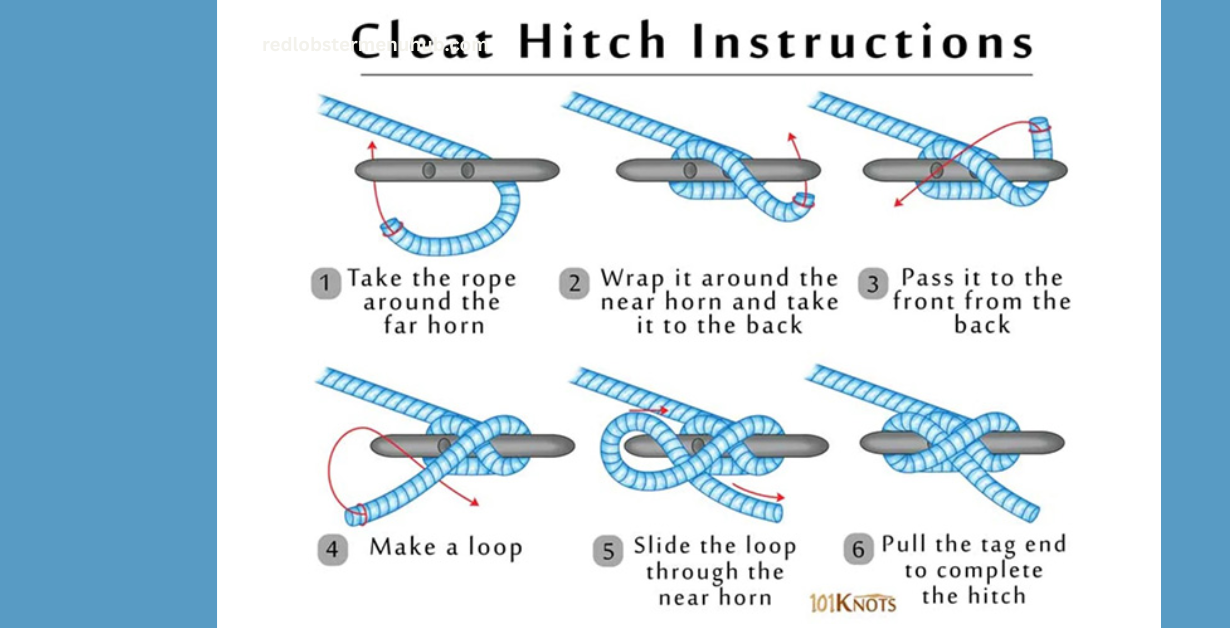
1. Cleat Hitch
The cleat hitch is one of the most important knots for boat owners. It is used to secure a dock line to a cleat on a boat, dock, or pier.
Common uses
● Securing a boat to a dock
● Attaching spring lines
● Securing temporary mooring lines
● Adjusting dock-line tension
How to tie a cleat hitch
1. Bring the line around the base of the cleat.
2. Make one complete turn around the cleat.
3. Wrap the line in a figure-eight pattern around the horns of the cleat.
4. Finish with a locking turn by creating an underhand loop and dropping it over a cleat horn.
5. Pull the standing part of the line tight.
The finished knot should have neat, even wraps and a final locking loop that lies securely over the cleat.
Why it matters
A cleat hitch holds well under normal dock loads but can be released quickly when needed. Avoid piling random wraps over a cleat, as tangled line can be difficult to release under tension.
2. Bowline
The bowline creates a fixed loop at the end of a line. The loop will not normally tighten under load, and the knot can usually be untied after use.
Common uses
● Creating a loop around a post or piling
● Attaching a line to a towing point
● Securing a mooring line
● Making an emergency handhold
● Creating a temporary loop in a rope
How to tie a bowline
A traditional way to remember the steps is:
1. Make a small loop in the line.
2. Pass the working end up through the loop.
3. Bring it around the standing part of the line.
4. Pass it back down through the original loop.
5. Pull the knot tight while keeping the loop at the desired size.
The working end should extend beyond the knot by several inches. Always inspect the finished bowline to confirm that the loop and wraps are properly formed.
Not sure how a personal locator beacon actually works or when you would need one? Our guide, What Is a Personal Locator Beacon? How PLBs Work, explains how PLBs send emergency distress signals and why they can be valuable when you’re outside reliable cellular coverage.
Why it matters
The bowline creates a secure, non-slipping loop. It is especially useful when you need a loop that must remain a consistent size under tension.
3. Two Half Hitches
The two half hitches are used to secure a line around a post, rail, ring, or other fixed object. This knot is simple and useful for temporary attachments.
Common uses
● Securing a fender line
● Tying a line to a railing
● Attaching gear temporarily
● Securing a painter line
● Fastening a light-duty line to a post
How to tie two half hitches
1. Pass the working end around the object.
2. Bring the working end over and around the standing part.
3. Pass it through the loop you created and pull tight.
4. Repeat the process to form a second half hitch.
5. Pull the standing part and working end to snug the knot.
The two hitches should sit neatly beside each other rather than becoming separated along the line.
Why it matters
Two half hitches are quick to tie and easy to adjust. They work best for moderate loads and temporary applications. For critical or heavily loaded connections, choose a more appropriate knot or follow the equipment manufacturer’s instructions.
4. Clove Hitch
The clove hitch secures a line around a post, rail, piling, or similar object. It is useful when you need to adjust the position of the line quickly.
Common uses
● Temporarily securing a line to a rail
● Attaching fenders to a rail
● Tying a boat to a post temporarily
● Positioning equipment or small items
● Creating adjustable attachments
How to tie a clove hitch
There are two common methods.
Method one: Around an accessible end
1. Pass the line around the post.
2. Cross the working end over the standing part.
3. Wrap the working end around the post again.
4. Tuck the working end under the second wrap.
5. Pull both parts tight.
Method two: Sliding over a post
1. Form one loop in the line.
2. Form a second loop beside the first.
3. Place the second loop behind the first.
4. Slide both loops over the post.
Why it matters
A clove hitch is fast and easy to adjust. However, it can loosen when the line is not under steady tension or when the load shifts repeatedly. For that reason, it is not always the best choice for a critical mooring connection.
5. Sheet Bend
The sheet bend joins two lines, including lines of different diameters. It is more useful than a square knot when the lines are unequal in size, or the connection may experience changing loads.
Common uses
● Joining two dock lines
● Extending a rope
● Connecting lines of different diameters
● Making temporary repairs
● Joining rope ends in an emergency
How to tie a sheet bend
1. Form a bight, or U-shaped bend, in the thicker or larger line.
2. Pass the working end of the smaller line up through the bight.
3. Take the working end around the back of both parts of the bight.
4. Tuck it under itself on the same side where it entered.
5. Pull the lines in opposite directions to tighten.
For additional security, especially with slippery rope or uneven lines, a double sheet bend can be used.
Why it matters
A sheet bend is a practical way to connect two ropes without permanently modifying either line. It is generally more dependable than a square knot for joining lines under variable tension.
6. Figure-Eight Knot
The figure-eight knot is commonly used as a stopper knot. It prevents a line from running through a block, fairlead, or other opening.
A PLB is not the only option for staying connected in remote areas. If you’re comparing emergency communication devices, read our guide to Personal Locator Beacon vs. Satellite Messenger: Which Is Better? to understand the key differences in messaging, emergency signaling, and everyday use.
Common uses
● Preventing a sheet from running through a block
● Stopping a line from slipping through a fairlead
● Marking the end of a rope
● Creating a temporary stopper
● Securing control lines
How to tie a figure-eight knot
1. Cross the working end over the standing part.
2. Bring the working end behind the standing part.
3. Pass it over the front of the line.
4. Tuck it through the loop from the front.
5. Pull the knot tight.
The completed knot should resemble the number eight.
Why it matters
A figure-eight knot is easy to tie, easy to inspect, and usually easier to untie than an overhand knot after being loaded. It is especially useful on lines that could otherwise run through hardware and become difficult to retrieve.
7. Rolling Hitch
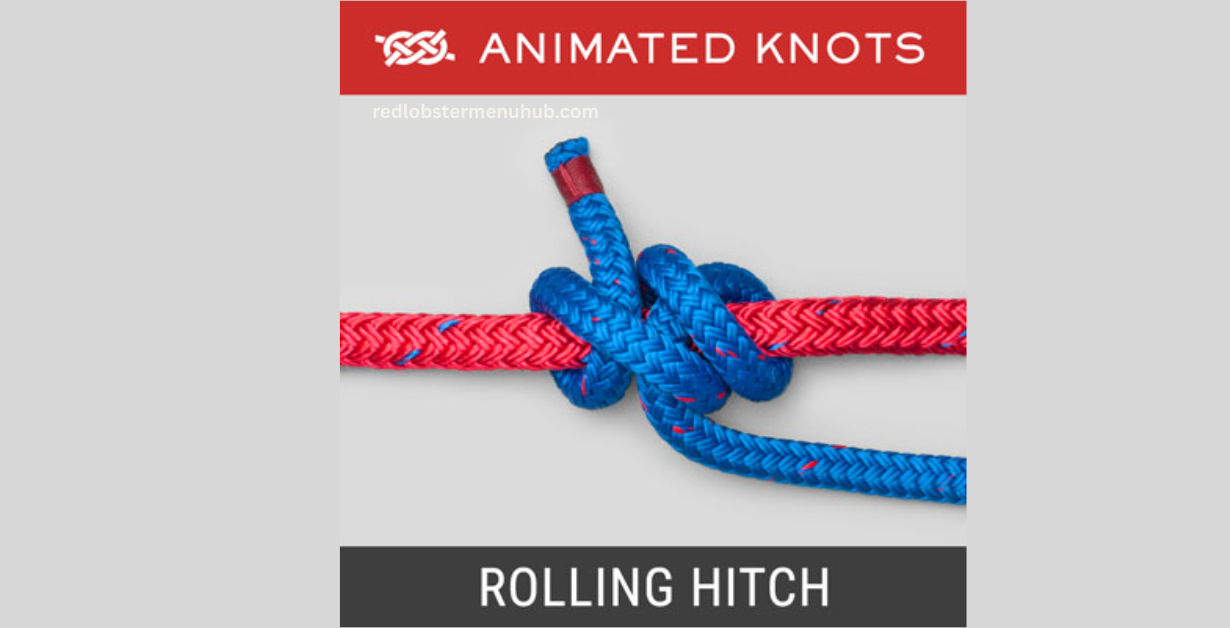
The rolling hitch is designed to grip a line, pole, or other object when the load is primarily in one direction. It can be used to attach a line to another line temporarily.
Common uses
● Taking strain off a loaded line
● Creating a temporary attachment to a larger rope
● Securing a fender line to a tensioned line
● Helping move or control a loaded line
● Creating a temporary hauling point
How to tie a rolling hitch
1. Pass the working end around the object in the direction of the expected pull.
2. Make a second wrap beside the first.
3. Cross the working end over the standing part.
4. Make a third wrap on the opposite side of the crossing.
5. Tuck the working end under the final wrap.
6. Pull the hitch tight in the direction of the load.
The wraps should be neat and positioned so the hitch grips when tension is applied.
Why it matters
A rolling hitch can be useful when you need to attach a line to another loaded line without releasing the original tension. It may not hold reliably in every rope type or load condition, so test it carefully before depending on it.
How to Choose the Right Boating Knot
Choosing the correct knot depends on what you are trying to accomplish.
| Task | Recommended knot |
| Secure a line to a cleat. | Cleat hitch |
| Create a fixed loop | Bowline |
| Tie a line to a post temporarily | Two half hitches |
| Attach a line to a rail or post with adjustability. | Clove hitch |
| Join two lines. | Sheet bend |
| Stop a line from running through hardware. | Figure-eight knot |
| Attach to a loaded line. | Rolling hitch |
The line material also matters. Smooth synthetic rope can behave differently from older, rougher rope. A knot that holds well in one type of line may slip in another.
Common Boating-Knot Mistakes
Even a correctly chosen knot can fail if it is tied or used improperly.
Using the wrong knot for the job
A clove hitch may be convenient, but it can loosen if the load changes. A stopper knot will not secure a boat to a dock. Match the knot to the task.
Leaving too little tail
The working end should extend far enough beyond the knot to prevent it from slipping through. A short tail is especially risky with slippery rope.
Tying knots in damaged line
A frayed, cut, heat-damaged, or heavily worn line may fail regardless of how well the knot is tied. Replace compromised rope.
Loading a knot without inspecting it
Check that the wraps are neat, the knot is dressed correctly, and the line is not crossed in an unintended way.
Using knots in place of proper hardware
Knots are useful, but they do not replace correctly rated cleats, shackles, chocks, winches, tow points, or mooring hardware.
Relying on an unfamiliar knot during an emergency
Practice each knot before you need it. Under stress, a familiar and properly applied knot is safer than a complicated knot you have only seen once.
How to Practice Boating Knots
The best way to learn boating knots is to practice regularly with a section of rope similar to the line used on your boat.
Try the following:
1. Learn one knot at a time.
2. Practice tying it slowly.
3. Tie it with your eyes on the line rather than relying only on memory.
4. Learn how to inspect the finished knot.
5. Practice releasing it after applying moderate tension.
6. Try tying it with either hand.
7. Practice in low light or while wearing gloves.
8. Teach the knots to everyone who regularly operates the boat.
A short length of dock line kept aboard can serve as a useful practice tool.
Knot Safety and Maintenance
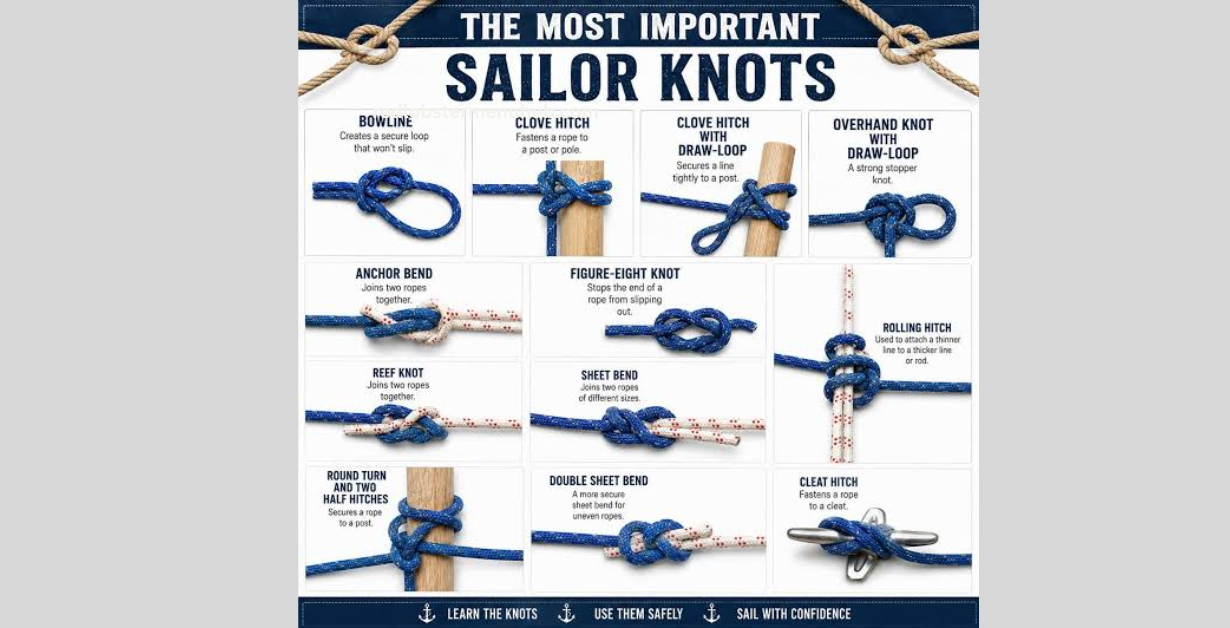
Knots should be inspected regularly. Exposure to saltwater, sunlight, dirt, and repeated loading can weaken both the rope and the knot.
Keep these practices in mind:
● Rinse lines with fresh water after saltwater use.
● Allow rope to dry before storing it.
● Replace lines showing serious wear.
● Avoid dragging rope over sharp edges.
● Inspect knots after a change in weather or mooring conditions.
● Untie knots when storing lines for long periods.
● Do not use a knot that has jammed or become badly distorted.
● Use chafe protection where lines pass over rough surfaces.
Remember that a knot can reduce the strength of a rope. The amount of strength lost depends on the knot, rope type, condition, and loading direction. Critical applications should use properly rated equipment and follow manufacturer or seamanship guidance.
Frequently Asked Questions
What is the most important boating knot to learn?
The cleat hitch is one of the most important knots for everyday boat owners because it is used to secure a vessel to a dock. The bowline is another essential knot because it creates a reliable fixed loop.
Is a bowline stronger than a cleat hitch?
These knots serve different purposes, so you shouldn’t compare them directly. A bowline creates a loop, while a cleat hitch secures a line to a cleat. The best knot depends on the application.
Can I use a square knot to join dock lines?
A square knot is easy to tie but may loosen or capsize when loads shift. A sheet bend is generally better for joining two lines, particularly when they differ in size.
Is a clove hitch safe for docking?
A clove hitch can be useful for temporary attachments, but it may loosen when tension changes. Use appropriate dock-line arrangements and secure critical lines with methods suited to the conditions.
How long should the tail be on a boating knot?
Leave enough line beyond the knot to reduce the chance of slipping. A common practical guideline is to leave several inches, although the exact amount depends on the rope type, knot, and application.
Final Thoughts
Learning a few essential boating knots can make docking, anchoring, towing, and everyday line handling safer and easier. Start with the cleat hitch, bowline, two half hitches, clove hitch, sheet bend, figure-eight knot, and rolling hitch.
The most important step is not simply memorizing their names. Practice tying each knot, understand when to use it, and inspect every connection before loading it. With regular practice, these knots will become dependable skills you can use both on routine trips and in unexpected situations.
📅 Last updated: